

These are screenshots showing the different panels on the screen.
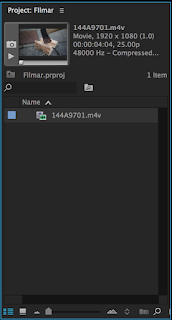
Project panel:

Source Panel:

Program Panel:


Source Panel:

Program Panel:

Tools Panel

Timeline

Media Browser:
When you want to import files into the project you need to browse for the files in this panel. They will show as thumbnails and you then drag the files you want up into the Project panel which will import them.

This shows the clip after it has been imported.
To start a sequence you click File>New>Sequence

You then select the settings you want and click ok which will create the sequence.

This shows the clip after it has been imported.

To start a sequence you click File>New>Sequence

You then select the settings you want and click ok which will create the sequence.

Your timeline will then show Audio and Video tracks.

You then drag the imported file onto the tracks and it will show in the preview box when the pointer is over the clip.

This is what the Project panel looked like for our project, there was many audio and video files imported, this was why we had to keep everything on one memory stick to avoid file errors and missing media.

In the same panel as the Media Browser there is also and Effects tab where you can select different effects which we used a lot during the editing of our trailer

There is also and effect controls tab in the Source panel which allows us to change colour, brightness, white balance and more. It also allowed us to control effects that we had added to video and audio.

This screenshot shows the tracks on the timeline. Over the two establishing shots of the house you can see we laid a shadowy layer over the top to give depth.

This screenshot shows the Basic Corrections tab, where you can edit the white balance, expose, contrast and change the darkness/brightness easily. A lot of our clips were very light as we had to film during the daytime so we changed a lot of the clips exposure and brightness to make it more dark and creepy. The colour was also quite bright in some of the clips so this was dulled down using the saturation and temp/tint sliders.

Vignette was added a lot on many clips to make them darker.

Curves were used to darken the shadows and lighten the highlights with more customisability than with the sliders on the basic corrections tab.

This shows the transition effects in use. On these two clips we put a dip to black which provided a fade out to black and in from black which connotes a change in location.

This shows the exponential fade transition on the audio which was used a lot, it basically allows us to fade the audio out when needed instead of it cutting out abruptly.

This shows how you can expand the tracks to see the levels of each audio clip and you can also change the DB output by doing this and dragging the middle line up or down to make it louder or quieter. The blue audio file in this screenshot has had the DB output heightened as you can see from the yellow line which would normally be in the centre.

This screenshot is showing the use of keyframes to change the audio level output so you can make it quieter or louder and it can vary even if its one audio file.

By right clicking on a audio or video file you can change the speen/duration of the clip.

This gives you options to speed or slow the clip down and to maintain audio pitch which we had to do on many occasions.


No comments:
Post a Comment